At this age, everyone can take photos of your property, and while this seems like an easy task, it can create a big problem. In the last five years, I have encountered thousands of property listings, and their photos have noticed that a lot of people are repeating this mistake.
 They think that photo quality doesn’t matter, so they take pictures with their phone. As a result, people recognise the property as a low-value and believe that it is overpriced. It can lead to two options, a lots client or a low offer below the market value. When this changes and people understand that first impressions matter the results are remarkable.
For example, Lisa is a landlord that I lived with, and even though she had a beautiful home, she had problems getting good tenants. She often had loud, messy residents who didn’t care about her property. And because she used blurry phone pictures it created a low-value perception of her property.
 She was worried that a professional photographer would be costly, and it will not change anything. I couldn’t change her mind, so I have decided to offer professional photos as a gift to see the results, and when Lisa started to use these photos, she noticed that she got more calls from qualified people. She saw how much more other problems disappeared with good tenants.
As a result, her tenants stayed a longer periods of time, and she decided to do an extension of extra two bedrooms that increased her revenue by £1000 every month.
Now if you do resonate with this, there are two obvious solutions for you. First one is to learn how to take professional photos or save some time and hire. If you do have any questions, you always contact me.
If you do decide to learn it more and do it yourself here are some tips:
There are five main parts to get the best quality property photography:
- Equipment
- Planing
- Preparation
- Shooting
- Post-production
 For the equipment, the most basic photography kit would look like this:
- DSRL Camera (Amazon Link: Canon EOS 800D– £559)
- Tripod (Amazon Link: Neewer Carbon Fiber Tripod & Monopod– £89.49)
- Wide-angle Lens (Amazon Link: Tamron 10-24mm Wide Angle Lens F/3.5-6.3 Di-II VC– £549)
- Memory card (Amazon Link: Sandisk Extreme Pro (64GB)– £89.49)
Protip: Get a few extra batteries to make sure you don’t ruin your whole day when a battery dies, and you have to wait for it to charge.
Tips for planning your shoot:
- Have a shot list to make sure you don’t miss any important parts.
- Make sure you have enough time to take the photos. (2-3 hours for 14 rooms property – depends on experience)
- Look at the weather and plan your time accordingly to the amount of the light from the sun. (Interior look best when it’s not too bright and exterior photos look better with a bright blue sky.)
 Tips for preparation of the property (Do not skip this step!) (Download our Free Decluttering checklist)
Main parts of the property:
Exterior and gardens:
- Remove vehicles
- Remove bins
- Clean windows
General Interior areas:
- Close windows
- Open blinds
- Remove pet and children toys
- Check all the lights.
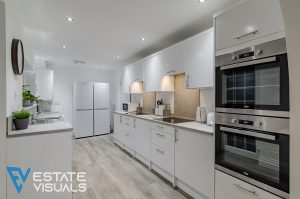 Kitchen:
- Clean sink
- Remove racks
- Hide garbage cans
- Set a table
Living room:
- Arrange cushions
- Remove personal photos
- Switch off TV
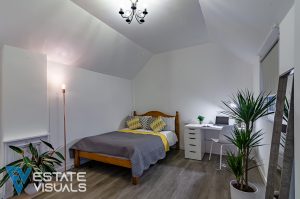
Bedrooms:
- Make a bed
- Arrange pillows
- Remove family photos
- Remove clothes
 Bathrooms:
- Clean mirror
- Put the toilet seat down
- Remove toothbrushes, soap, razors
- Put away cleaning materials
Tips for Pro Shooting:
- Set the right settings
- Use a tripod for stability
- Shoot on Landscape
- Take pictures from the corner
- Try not to cut the property features.
- Use HDR
Pro Post Production
- Give all photos a basic edit on Lightroom
- Use further editing for item removal
- Export photos at least 1024 x 638 pixels being the optimum size for uploading to Rightmove.
If there is only one thing, you take away from all of this. I want you to understand that using high-quality photography isn’t optional anymore. It’s an absolute must if you’re planning to get the most out of your property.


Recent Comments